Updated
Sep 03, 2026
Updated
Sep 03, 2026
 5 min read
 Checked regularly

How to Check That Your Token Is Supported
Before hunting for an address, make sure Trust Wallet supports the token on your network. It almost certainly does, USDT alone comes in ten network versions, but thirty seconds here beat a lost transfer.
- On the main screen, tap "Tokens".
- Tap the filter icon in the top-right corner and choose "Manage crypto".
- Type the token name in the search bar. The list shows every network version: USDT on Ethereum, Tron, BNB Smart Chain, Solana, Arbitrum and others, each as a separate line.
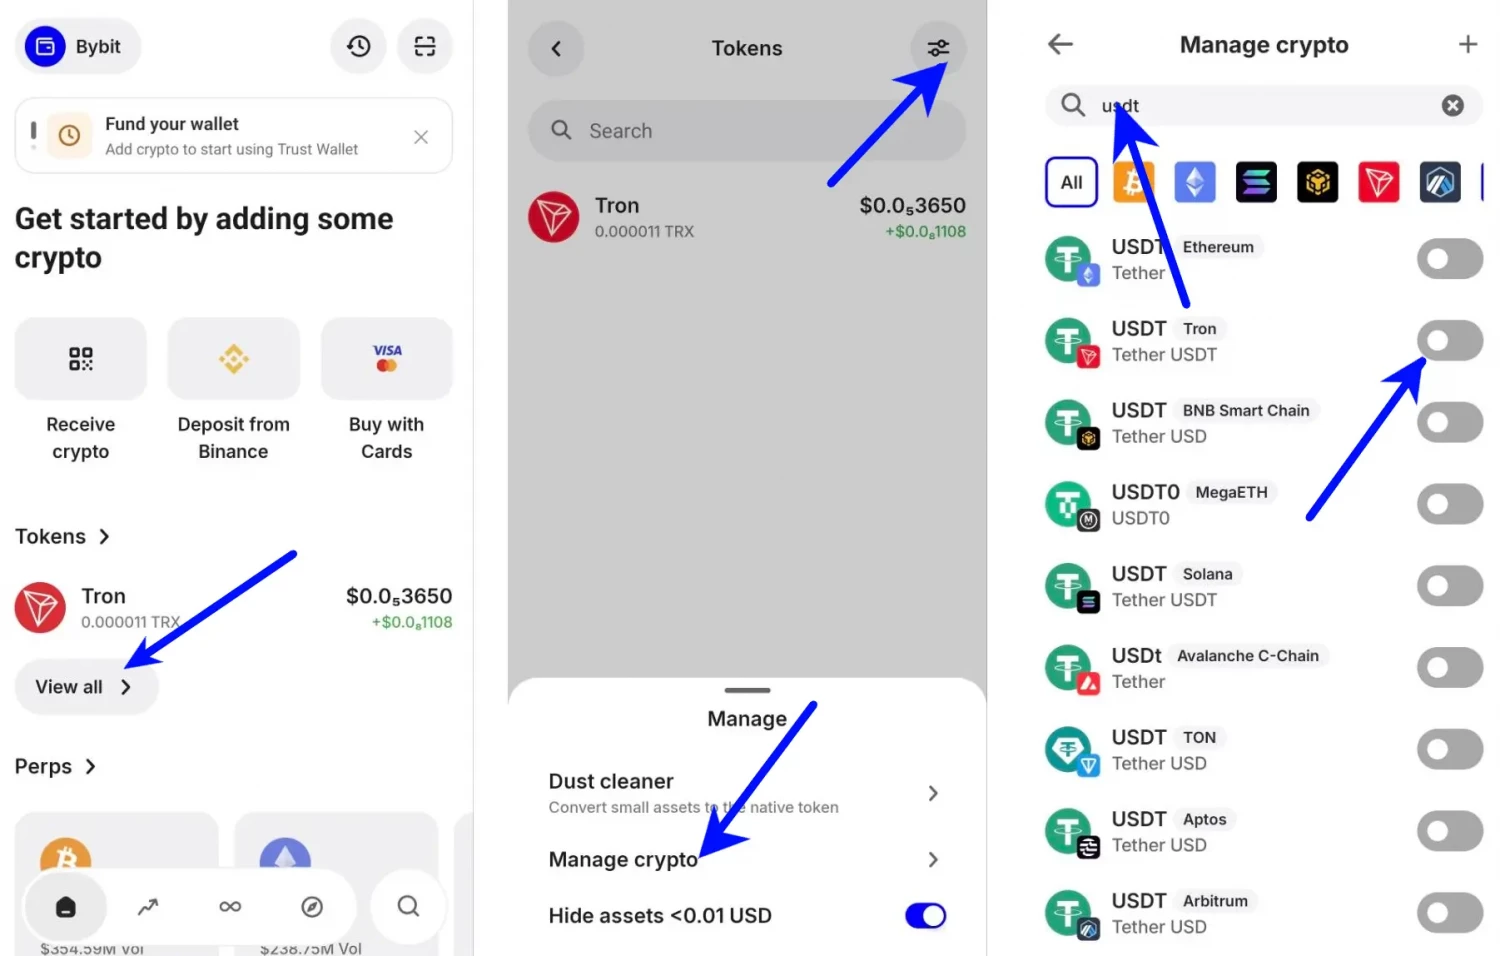
If your network is in the list, switch on its toggle right away and move on to the address. The coins arrive at the address either way, but without the toggle the balance can stay invisible on the main screen, and that moment of panic is avoidable.
How to Get a USDT Deposit Address in Trust Wallet
- On the main screen, tap "Receive crypto".
- Pick the network on the "Select network" screen. We use Tron (TRC20) in this example; any network from the previous check works the same way.
- The app shows a QR code and your deposit address.
- Copy the address: this is what you paste into the withdrawal form on the exchange or wallet you are sending from.
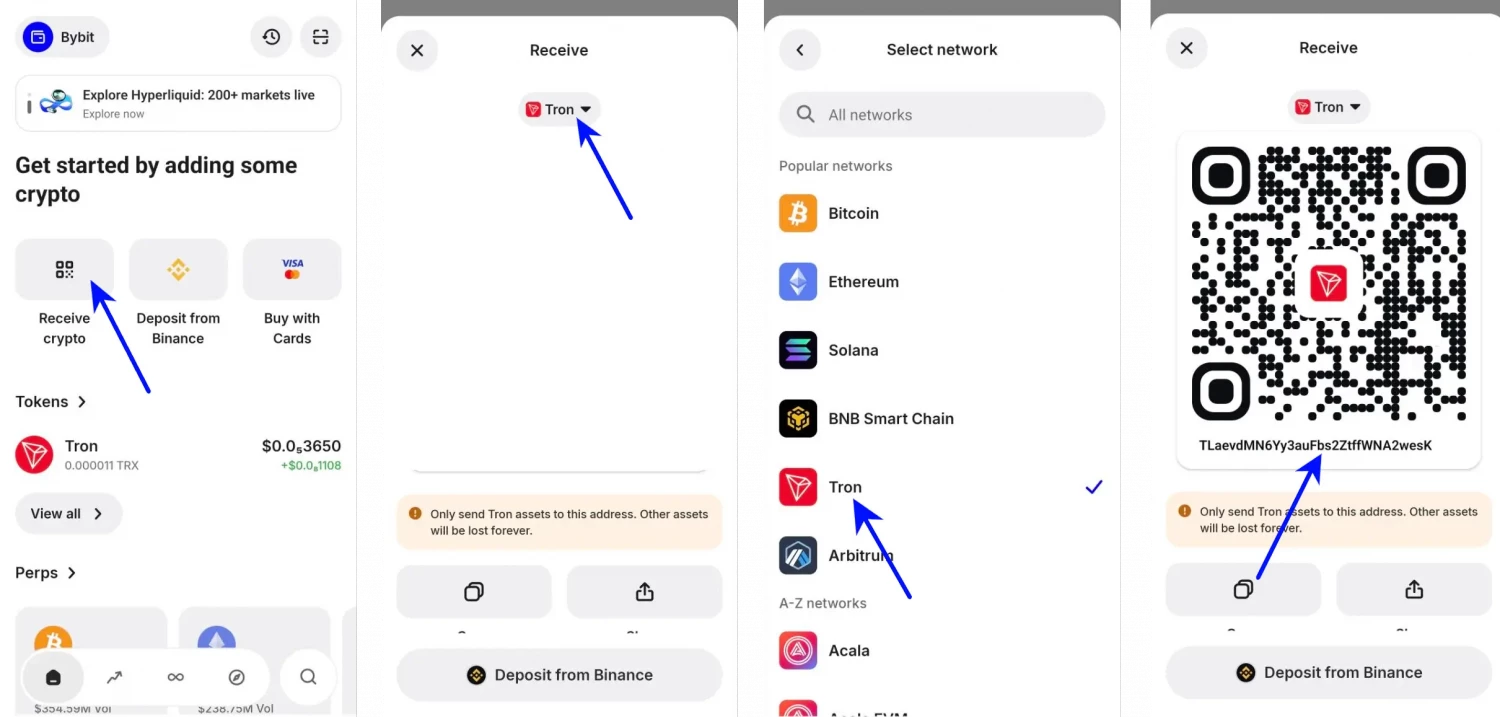
Right under the address Trust Wallet warns: "Only send Tron assets to this address. Other assets will be lost forever." Take it literally: this address is for the Tron network only, and every network has its own.
Once the first deposit arrives, the token usually shows up on the main screen on its own. If it doesn't, the fix is one toggle away, we cover it in the transfer section below.
Which Network Should You Pick?
The rule is simple: the network is dictated by the sender. Check which networks your exchange offers for USDT withdrawal and what each costs, then get the matching address in Trust Wallet. If you withdraw from Bybit over Tron, pick Tron on the "Select network" screen and use that address; an Arbitrum withdrawal needs the Arbitrum address, they are not interchangeable.
Trust Wallet itself charges nothing to receive; the withdrawal fee depends on the exchange and the network. On Bybit at the time of our test, the same USDT withdrawal cost 0 on Aptos, Plasma and Mantle, 0.1 USDT on Polygon and Arbitrum, 0.8 on ERC-20 and 1 USDT on TRC-20. The gap moves with network load, so treat the withdrawal screen as the source of truth.
How to Transfer USDT From an Exchange to Trust Wallet
We ran a real withdrawal from Bybit. The flow is similar on other major exchanges, only the menu names differ.
- In Trust Wallet, get the deposit address as shown above and copy it.
- On Bybit, open "Assets" and click "Withdraw".
- On the "On-chain Withdrawal" tab: pick USDT, paste the address from Trust Wallet, set "Chain Type" to the same network you chose in the wallet (TRON in our example), enter the amount and click "Confirm".
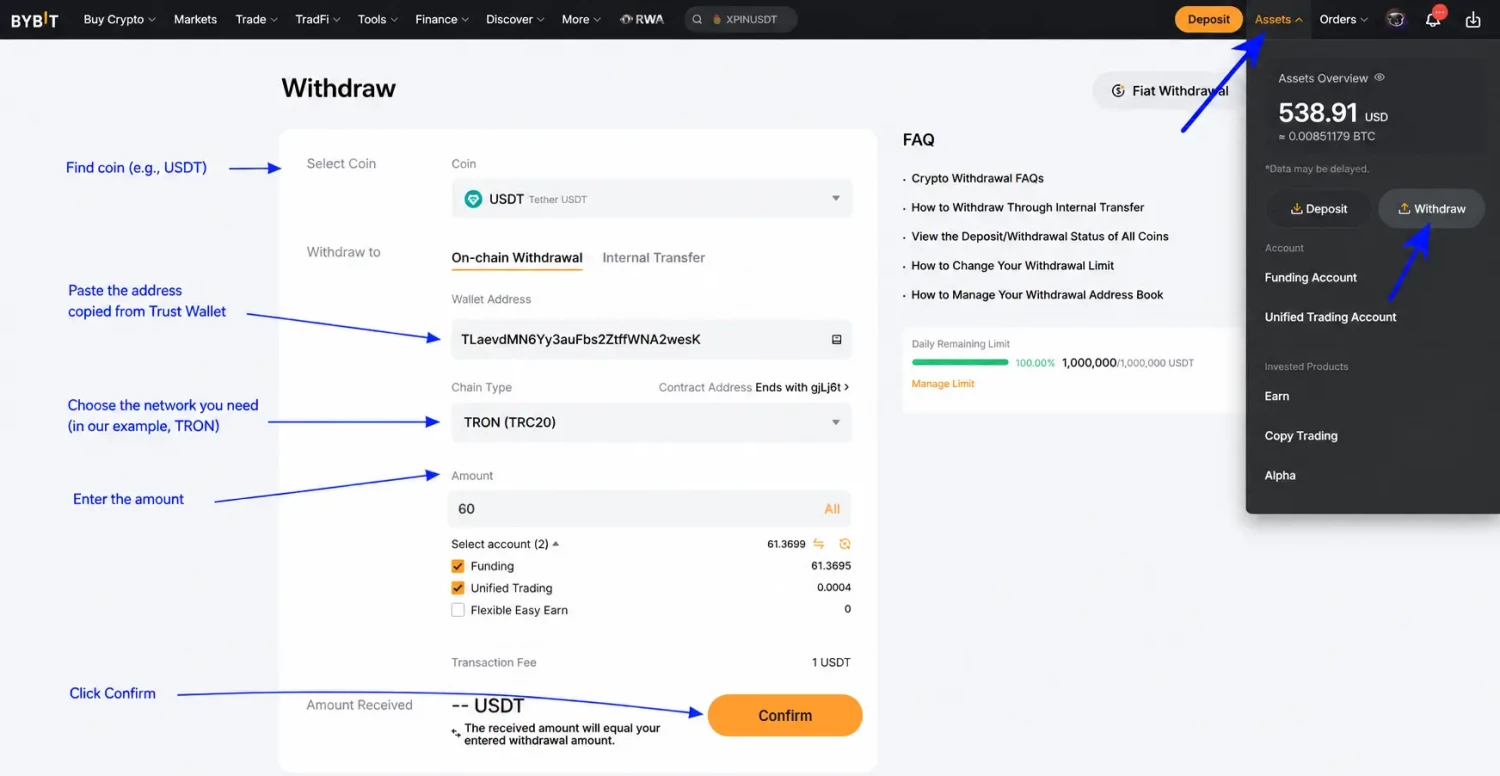
- Pass the security check: a code from your email plus the Google Authenticator code, then "Next Step". This is standard for every withdrawal, not a red flag.
In our test the coins arrived within a couple of minutes; the TRC-20 withdrawal cost 1 USDT in fees. Withdrawal fees are dynamic: check the amount in the withdrawal window before confirming.
If the transfer shows as completed on the exchange but your Trust Wallet balance looks empty, don't panic: the coins are on the address, the app just isn't displaying them. Go to "Tokens" → the filter icon → "Manage crypto", find your token and switch on the toggle for the network you received on. The balance appears instantly. It is the same "Manage crypto" screen from the first section of this guide.
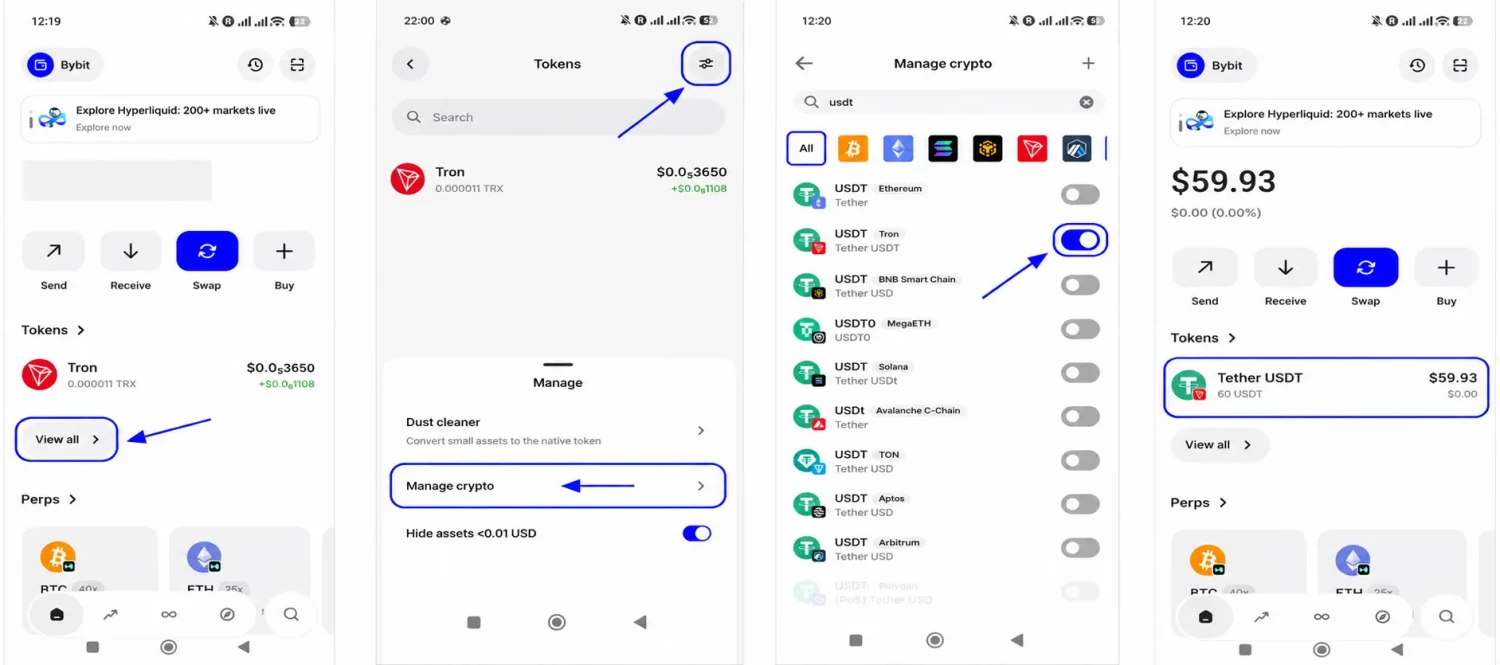
Two habits that save money here: check at least the first and last characters of the pasted address against Trust Wallet, and if the amount is serious, send a small test transfer first: a lost cross-network transfer is usually gone for good.