Updated
Sep 03, 2026
Updated
Sep 03, 2026
 8 min read
 Checked regularly
What You Need Before You Start
Install Google Authenticator on your phone first: App Store or Google Play, publisher Google LLC, free. Binance also offers its own Binance Authenticator and supports Microsoft's, but Google's is the practical standard: one app holds codes for every exchange you use, which is exactly why most traders with several accounts run it. Besides the app you need access to your Binance account and paper for the backup key. Paper, not a screenshot: a screenshot lives in the same cloud an attacker may reach.
How to Enable Google Authenticator on Binance
- Log in to Binance, click the profile icon in the top-right corner and open "Account" → "Security".
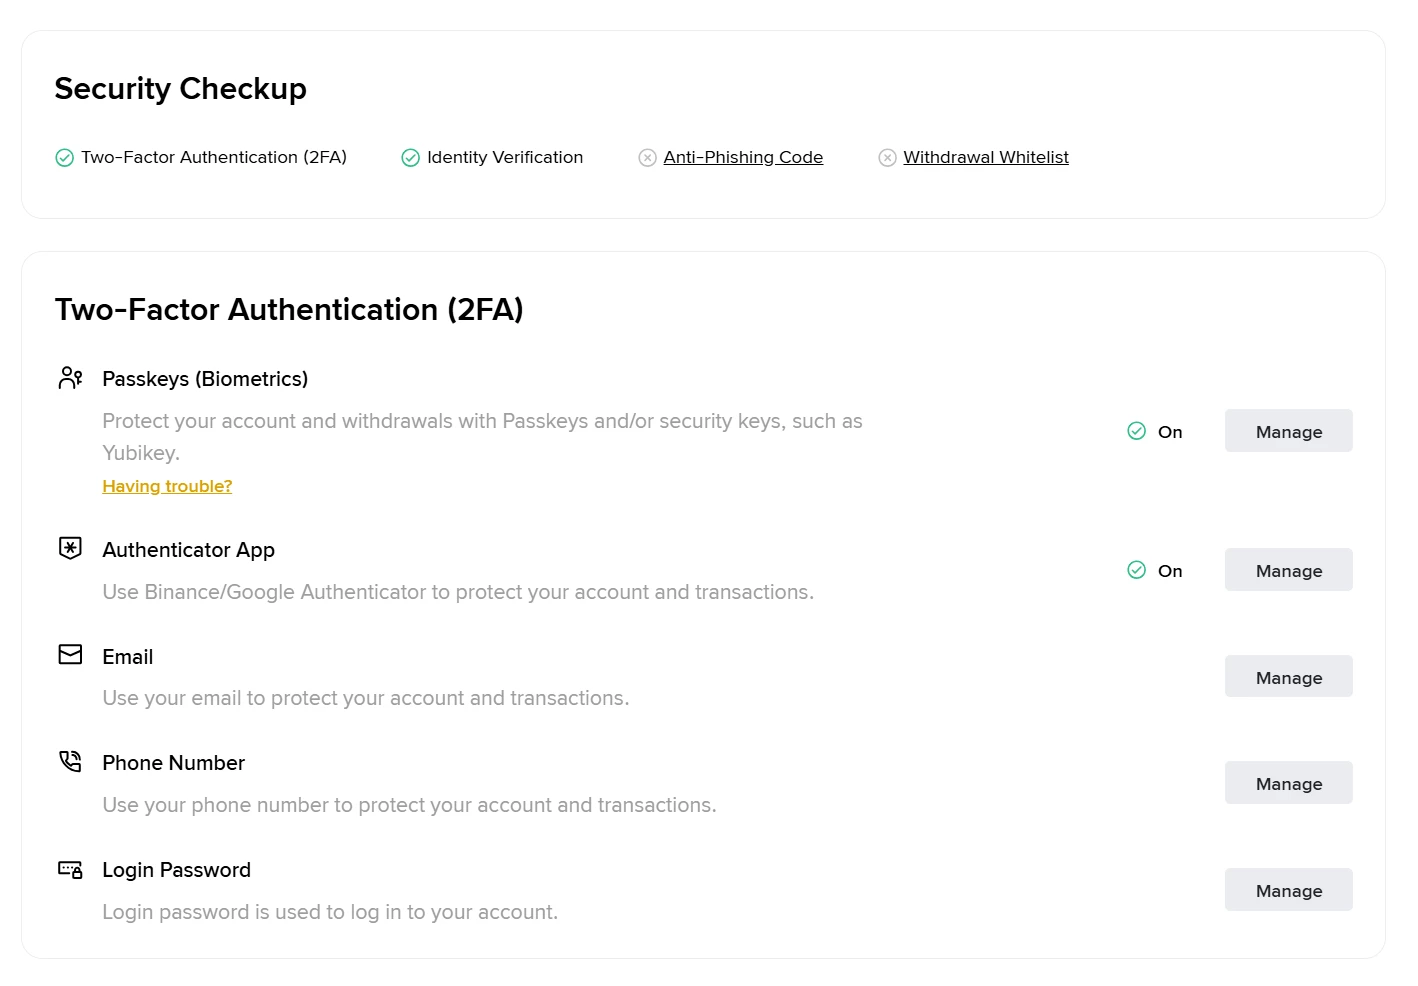
- In the "Two-Factor Authentication (2FA)" section find "Authenticator App" and click "Manage".
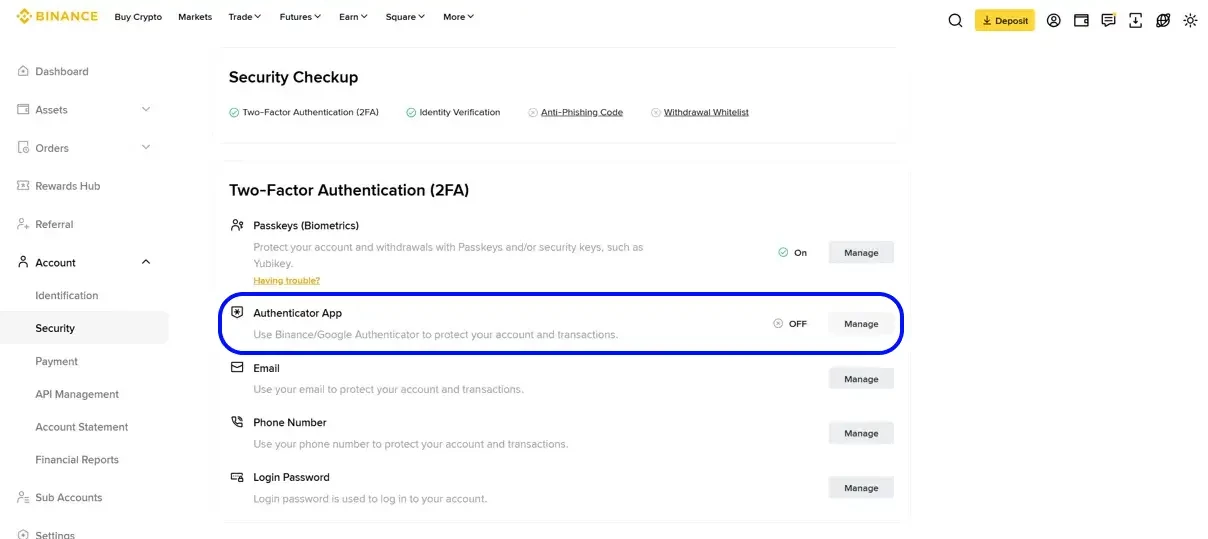
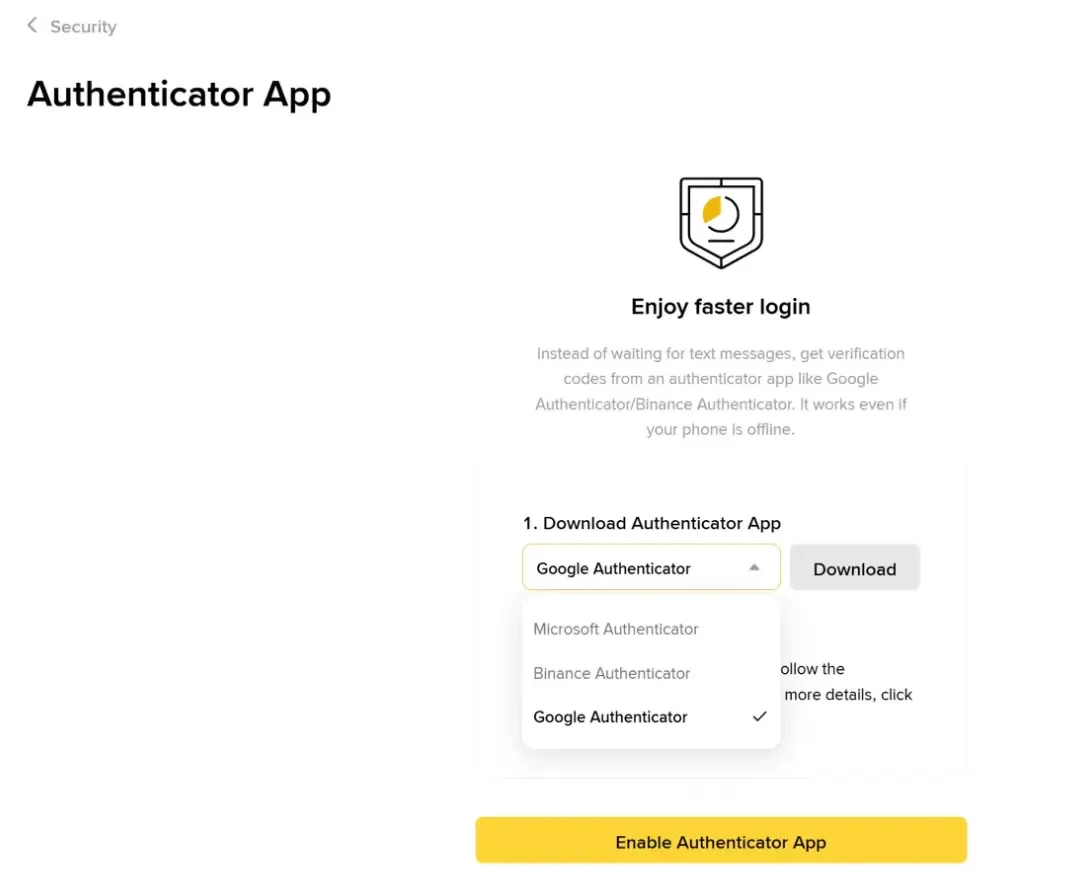
- On the "Authenticator App" page pick "Google Authenticator" from the list and click "Enable Authenticator App".
- Binance opens the "Link an Authenticator" window with a QR code and a setup key under it. Write the key down on paper before anything else: this key is your way back if the phone is ever lost, and it does the same job as the QR code.
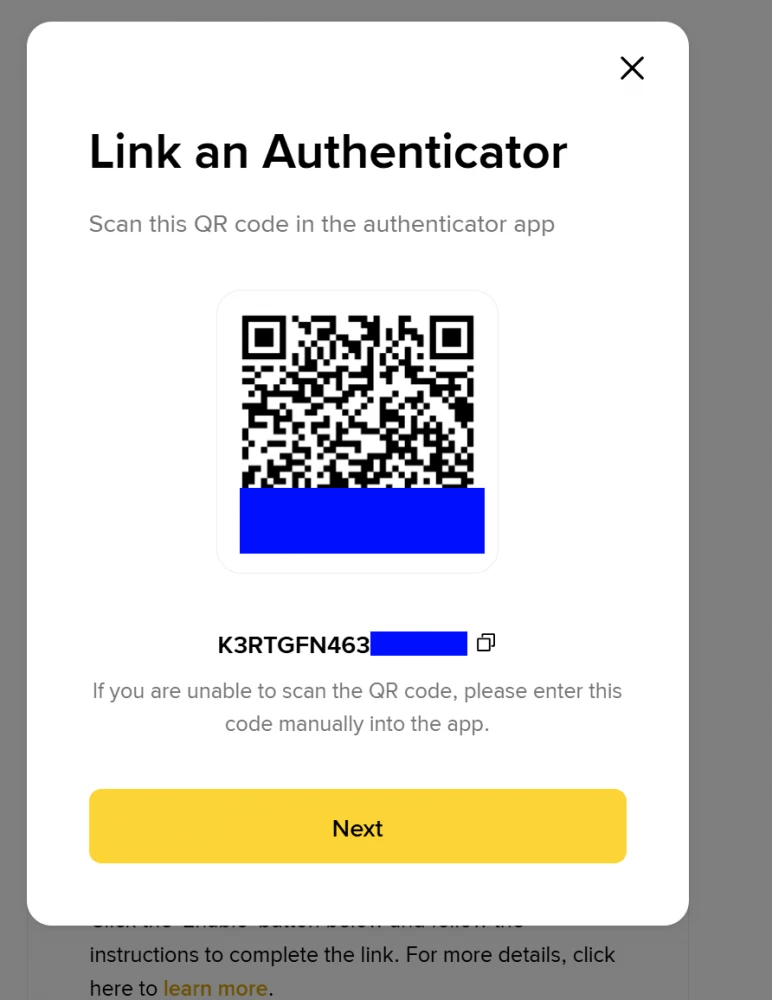
- Open Google Authenticator, tap "+" and either "Scan a QR code" or "Enter a setup key" with the code from step 4. A Binance entry with a six-digit code appears.
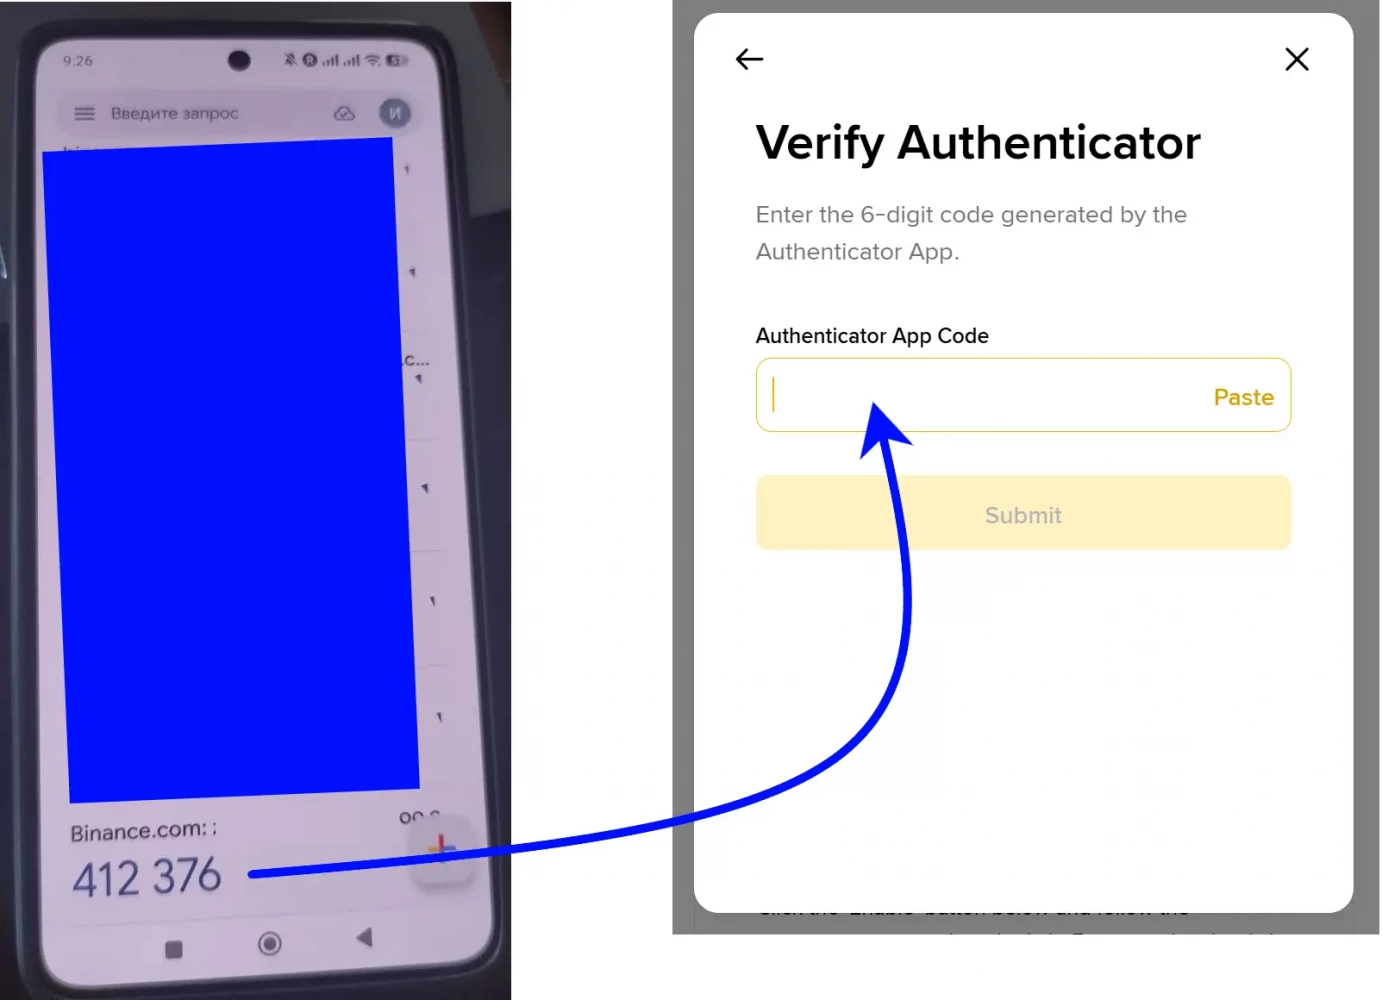
- Click "Next" in Binance, type the current six-digit code and confirm. Done: from now on, sensitive actions ask for the live code.
How Google Authenticator Works
No magic and no internet involved: the app and Binance share that secret key, and both run the same math on the current time. Every 30 seconds the result changes, and that result is your code. This is why the app works offline and in roaming, and why the single most common failure is a phone clock that drifted: wrong time, wrong codes. The fix is one switch: automatic date and time in the phone settings, plus "Time correction for codes" → "Sync now" in the app on Android.
One modern caveat: Google Authenticator can sync entries through your Google Account. Convenient after a lost phone, but it means your codes are as safe as that Google Account itself, so lock it with its own 2FA or turn sync off for exchange entries.
How to Disable Google Authenticator on Binance
- Open "Account" → "Security" and click "Manage" next to "Authenticator App".
- Click the trash icon next to your authenticator entry.
- Binance shows a warning: withdrawals and P2P might be disabled for 24 hours after removal, and running a single verification method puts the account at greater risk. Tick both boxes and click "Continue".
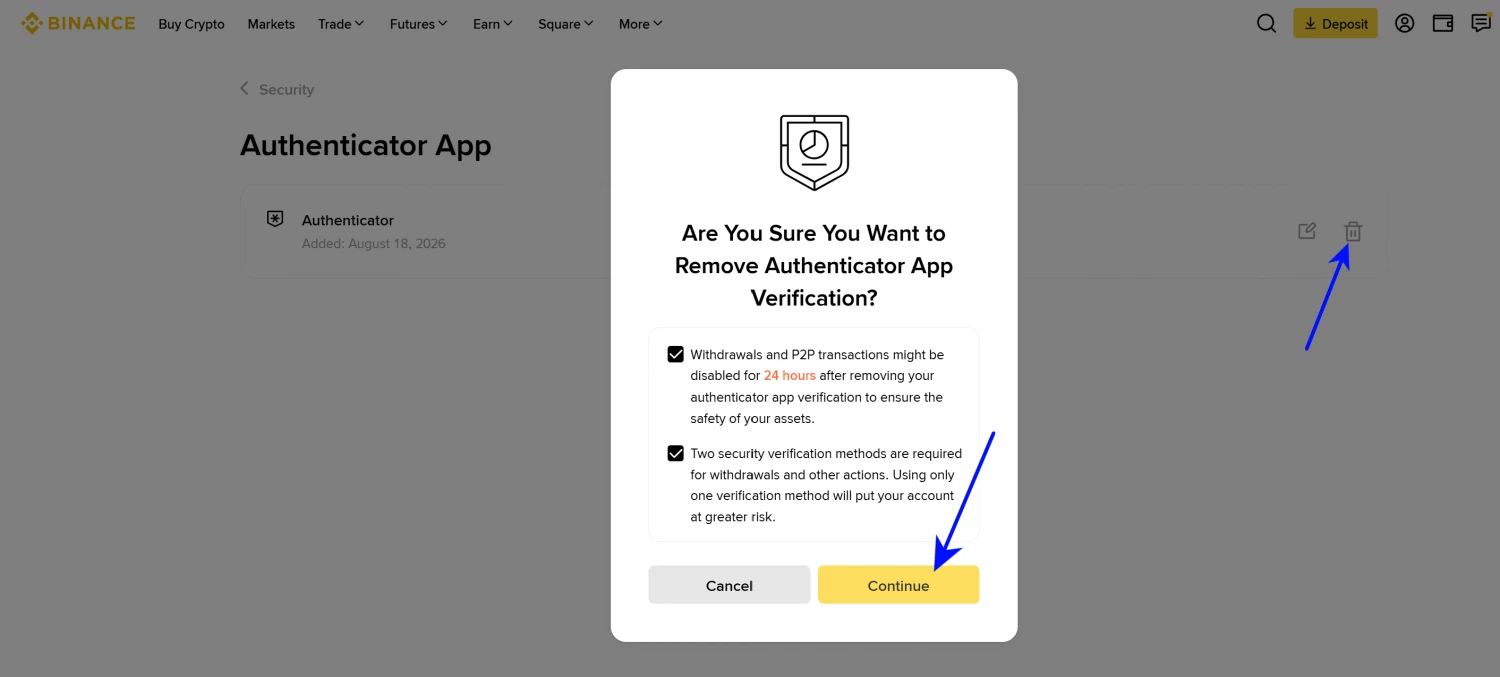
- Confirm the removal with any of your remaining methods: a passkey, the current app code or an email code.
Three things to know before you do it. If anyone asked you to disable 2FA — support, a "safe account" manager, an investment advisor — stop: that request is the scam itself, no legitimate service needs your protection off. The 24-hour hold on withdrawals and P2P is not a bug but the point: it is the window in which you would notice an attacker removing your protection. And disable the old entry only after the new method works: if you are switching phones, install the app on the new one, restore the entry with the backup key, test a login, and only then wipe the old device.
With the backup key: five minutes. Install Google Authenticator on any device, tap "+" → "Enter a setup key", name it Binance, type the key, and the working codes are back.
Without the key: a 2FA reset through Binance. On the login screen choose the lost-2FA option and pass the identity verification; the account survives, but you can lose days instead of minutes, and withdrawals stay restricted after the reset. The backup key on paper is the whole difference between these two paragraphs.